Wednesday, 11 November 2009

Week 8


This is it, the week where I will be finishing my modelling. So far I have created the lake containing reflective effects while we can see the reflection of the cliffs and mountains. As I did not mention from the early process, I've added some trees to the field. I simply used from the American Elm from the AEC Extended panel.

Ok so I now have the background and all is needed is the Dredger. As researching of this particular machine. I was unable to find any information/ images regarding any details of how this machine works. But thanks to my teammate Daniel, he has provided a photo that he took of the image of the Dredger at the Museum.

This is the look of how I will model the Dredger.


Now modelling it. I started with both, size did not matter as I will be scaling it after modelling all its details. Segments of 10 was essential so that I can extrude the points to form the shape that I want it to be.


I modelled the top with some wheels as from the real image above. It was hard to tell how it looked like but I assume it spins in circles as this is part of the functionality.


It gets more complicated when you do not know certain parts are called and the fact that cannot see it clearly. The bottom of the dredger seems to have some kind of access which guessing it could be an open doorway. I've started by applying a box, then position it in the centre. Because we will be animating inside the dredger, I've used Boolean to make the open. A roof has also been applied as it shows in the photo.


For the texture, it was hard to say how the colour really looked like. Thinking back, it is set in the 1800's so the texture would be old and so I did a quick search for the materials of rusty metals and luckily I've found some that looks suitable for the dredger.


If I scale it to its right size, this is what it looks like.


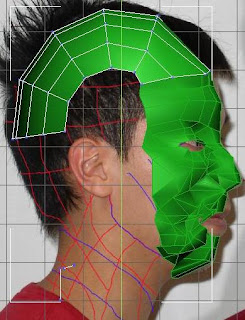
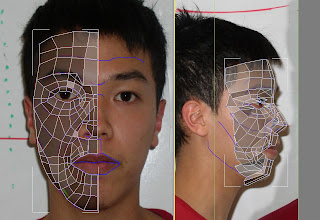
I am feeling very pleased with the progress on this subject that because modelling the head was a disappointing result in the end but this group work is turning out to be fun and enjoyable although the lack of time we have to finish off the modelling process.


Nearly there. From the photo I can see smoke from the chimney. Now I have no knowledge in creating smoke but luckily going through tutorials, it wasn't as complicated as I thought. Now creating the smoke. I go to Geometry, selecting Particle Systems and then pick PCloud. The size does not matter as it is dealt in the panel. From the Particle Generation, Particle Quantity. I select Use Total and set as 100, it will display how many objects it will have.

Setting the Particle size: 20.0

Setting the Particle Type - Standard Particles to Sphere


At the moment the smoke will appear as sphere shapes but using the Material Editor we can fade it and add the smoke texture.


From Maps in the Material Editor, I go to Diffuse and select Noise. I set the Noise Parameters as follows:

size - 25.0

Fractal

Levels - 10.0


If I go back to default I can then open up the
Opacity Map. Select Falloff.


I need to get the smoke colour correctly and so if I swap the Maps by clicking the arrow on the right end, it will swap maps. Then on the top map, it is empty. I select it and choose Noise. The parameters need to also be set correctly.

Turbulence: High - 0.3

Levels - 10.0

Size - 20.0

The final part creating smoke. I go back to Maps again, drag the
Opacity Map down to Bump. It will copy the map and there a smoke texture is completed.


I am close to finish the modelling process, I now need buckets as this will be part of the animation. Very easy I simply use a box and then Boolean the centre.

By zooming in we can see how it looks.


Now the environment still seems small and in my opinion it doesn't look exactly like Switzerland and so by applying more models, I get a larger scale of the background.


By cloning the mountains, I can cover the spaces so we cannot see any water behind. Adding more landscape and trees it will create a larger scale of the environment. After Looking back at the real photo of the dredger I've noticed that the bottom underneath it looks like a boat? and seems to be floating above the sea.


I feel that modelling it is the priority of this task and also it will affect the marks if I don't get the similarity correct and although the boat looks complicated to see the details, I've simply used a box, then used vertex (use soft selection) to get the all four edges. With a small fragment using the Bend modifier, I can get a slight curve setting its x to a minus. For the texture, again it is hard to tell from the photo but noticed the colour is the same as the dredger and so I have used the same for mine.


This is the final completion of the Dredger based in Zurich of Switzerland.


Group


This weeks group meeting went very well. We've discussed what we will need to focus on for week 9 (the animation). We've checked the progress of everyone's individual modelling and we are all happy with the progress so far. I feel that the group is doing very well, keeping the targets up to scratch and hopefully the animation, the hardest part we would complete by week 10.

Wednesday, 4 November 2009

Week 7


As from the list of the tasks of our group discussed on. My job is to create the background environment of the Zurich lake in 1892. I find just researching the area is harder than I would have expected. Very hard and rare to find images when its history is based in the 1800s. Although I could not find the exact year of it but I was luckily able to search for this image of an early stage.


The first tourist Steamship gate at Bauschanzli in Zurich (1835-1883). This is probably the closest image I can get but I now have some idea what it looks like and how I am going to model to its similarity. It has the lake, mountains, trees and buildings, so this is exactly what I need. Texturing the lake, trees and mountains should not be a problem for me but the buildings is a challenge especially when there are no colours in this image but hopefully in the end I will have the full environment completed on week 9.

The work:

Ok this is it, I need to create the whole environment. I start with the more nicer surface and thats the lake. Using the same method that I have done with from year 2 it is more useful as I did enjoy creating water. Ok to start of with, I've applied a cylinder which in large scale.


Now for the water effects. I open up Material Editor, for the Ambient I need a blue colour for the water. I then set its Specular level to 121 and Glossiness as 50.


By selecting Maps, I go to Reflection and choose Raytrace to get some effects.

Underneath I select Bump, then Noise and it allows me to open up the Coordinates. With this I can then set the size to 8.0.


The Noise Parameters also needs to be set to Fractal.


By testing to see if the water is suitable enough for the actual environment, I've applied an Omni-light then rendered it to see the result.


It doesn't look too disappointing but with a few adjustments to the effect of the water, it should like fabulous.

The next tast is to model the mountains/ cliffs. I thought this would be some challenge to me as concrete rocks are related to to the textures of the mountains. Here is the first attempt. I use a simple plane then by setting its:

width: 232.987
length: 360.381
length segs: 64
width segs: 64

By converting it to a Polygon I can then use Vertex to shape out the plane so I can get dents and form hills as required. Ticking Use Soft Selection I then model the mountain more in depth.


Ok so I've now added cliffs, I also wanted to model the environment correctly to the design from the storyboard and so I've created another sets of mountains but this will contain a different texture to the ones in front. Using the same method for the cliffs, I've simply changed the size more larger and then position them behind the cliffs.


For the textures, I've find it hard to search any resources from the Internet to help me so that I can use the Material Editor. With no luck, I needed textures and so by searching for images of rock/ cliff textures, I've found this one.


Now you can see I have the sea, the cliffs and the mountains (which needs textures).


Again having the same problems finding resources/ tutorials, I've used another image that contained snow. With some simple editing on Photoshop, I clone certain features to get the whole image as a one.


The next part is easy, just apply the bitmap image onto the Material Editor and drag it to the model. Render it and we have the mountain.


As the progress is getting along nicely, I feel I needed to add one more features to the environment before I finish the week and that's the sky. One of the best methods to creating a sky is using a cylinder because it surrounds the area and gives more accuracy to the environment.


Ok so I now need to test it with light. Using Omni light, I position it just near the central line
so there is more light.


Here is the progress so far.


The Group:

I feel at the moment the group is working very well with good starts with the modelling process. We've discussed
any other tasks that may have not yet been discussed on. Any further plans before hand and any problems we
may have occurred. All the specific ideas has been discussed and it went quite well and at this moment it is still
early even though our main target is to get the modelling done by week 8.


Tuesday, 3 November 2009

Week 6


The past five weeks has been hard working, mostly focusing on developing the 3D head. Even though the final result of the head was unsuccessful we now focus on a new topic. A group work to develop and animate a compound steam engine. We have already visited the Museum of Power on week 4 and this week we've prepared a presentation based on the ideas of what we will be working on last Thursday.

I find this is going to be interesting as for myself I will be working on the background environment but also hopefully I can provide some help with modelling the engine.

After the presentation we discussed further more of what each member will be working on. We've also provided a group blog now so that all the details and information of the meeting and the progress of our work can be viewed.

Saturday, 10 October 2009

Week 3-5 (Completing 3D model & visiting the Museum of Power)

Now I begin the modelling process. I start off by coping the front view but instead of cloning it, I use a different

method to this, by selecting Symmetry it changes the face into a thin layer in the centre. If I flip it, the full face

appears. The face need to be adjusted again and so by selecting the + sign next to Symmetry, I click on Mirror

and then drag the other half of the Topology and form a whole face. This is where things became difficult, I have

tried to use Nurms Subdivision the surface but there were no effects to it, instead the quads started shaping

differently. I un-tick the Nurms Subdivision and tried to use vertex to remove the sharp edges. Due to the fact

that I was aware of the amount of time I have to complete the modelling. I have decided to continue to try and

mesh the surface. In the end it did not fully go as planned and now I have dents around the face. The nose was

a struggle as some of the quads I may have not included in the Topology. As the result I’ve decided to use

Vertex to add the structure of the nose. With the nostrils I have tried to follow the method, creating a

polygon and then extruding it but it did not occur as anywhere near as the example in the tutorials.


The next part is to create the back of the head. The simple step is to create a Sphere and place it behind the

model while scaling it so its size fit with the face. After that I cut out parts of the Geometry so that it joins and

lines up with the face and as you can see the screen dump below, the Geometry does not comply with the

rest by using the Edges, selecting some of the lines. Then I use Ring and Collapse to shorten the amount of

polygons because there is no need to have so many and that way it will be easier to add the rest of the

polygons.


Now that parts of the Geometry has been removed, I concentrate adding the required surface to the back of the

side, back of the head and also the neck.

As each week gradually moves on I feel my work hasn't progressed enough because of the amount of time spent

on meshing it.


By selecting the ends of each quads, I can drag and form another quad to make the process easier while

working downwards to the neck. Some became awkward and confusing once I have combined the face and the

back together because the polygons did not join correctly.


I need to get the other half if to get a full scale head and so by repeating the same previous method earlier from
using Symmetry and then mirror it. Although I have the full head, the appearance of the head did not satisfy me.

I still cannot use Turbosmooth to get a smoothing edge for the back of the head. With the back of the head and

neck, I need to attach them onto the face. How I done it was I simply selected both the face and the back of the

head and clicked Attach.


As you can see the top of the head seems to be the only part thats smooth, although it is a sphere but at least
there are no dents or sharp edges sticking out. For the mouth I've really tried to use the method for the nostrils
but again same result or bad result because by scaling it, it wouldn't form more polygons and so this is
another disappointing effort.


On the overall effort creating this 3D model of my face. I feel disappointed that I could not finish the entire
process due to the fact I have spent too much time focussing on trying to mesh it to get smooth surface

which in result I've ended up creating alot of dents to it. If I was back in week 2, I could have re-started the

whole Topology again and getting the quads correctly without any possible errors where there seems to

be triangles appearing. I was unable to smooth the model and was gradually running out of time to start anywhere

near with the ear and getting to the stage to Unwrap the textures.

The most important task was to get the full head completed and so I feel pleased that I have done that stage

but overall still disappointed that I could not apply any textures because I want to see how my 3D model

would look like.


so here is the 3D model of my face.


On week 3 our group organised to meet up and visit the Museum of Power in Langford to take

some photos and film a machine that we are going to create on 3Dsmax and animate it.

We've looked through every machine the museum has and we've decided that this machine is more

easier to see when we model it and we can see how certain parts operate and how each manoeuvres.

This is a photo that I took individually of the machine called Horizontal Compound Steam Engine.

I find this will be a very complexed task to create on 3Dsmax as 3D animation isn't my strongest

subject but we will see how the overall completion of the model will be in the final week.

So far no work has been done but our plan will be meeting up on week 6 and begin discussing each

member of the group who will be working on.


Monday, 5 October 2009

Week 2

This week I continued with the 3D modelling of my face. After drawing all the quads, I draw on the Topology, using the Line tool. This will allow me to add the surface to the Topology so that we get shape of the face.


This part was quite straight forward but some parts can be awkward such as between the eye and nose. It sometimes forms a triangle and so I have to manipulate it so that its a square.


Now that I've completed adding the surface, I attached all of the lines apart from the plane so that a solid surface appears.


Then by selecting the Edged Faces. I can see all my Topology which almost reminds me of the film from Mask.


This is the hard part, I have to get the front view key points and drag it to the side view to get them lined up as shown underneath. Most important is getting the vertices in a straight line and so select the x axis. By selecting the See Through Object, it allows me to see more depth of the axis.


After having attempt on adding the surface on my side view, it seemed the Topology did not combine well in this case the modelling would not work. I've then had to redo the front view surface again but this time getting all in the correct format.


As you can see, both views seems more satisfying than the previous attempt. Now I find the side view looked more complexed especially dealing with the eyes and between the nose but with more time and handling, I've managed to get this result.


Next step I will begin the modelling.